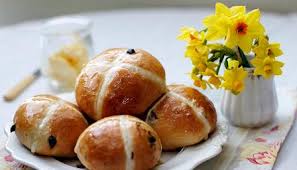
Cleansing Rose Face Mask Recipe

Taking care of your skin doesn’t have to involve harsh chemicals or wasteful packaging with this cleansing rose face mask recipe. A simple, natural face mask can work wonders for cleansing your skin, and the best part? You can make it right at home using ingredients available at Wasteless Pantry. This gentle rose face mask, made with white kaolin clay and rose water, is perfect for soothing and cleansing your skin while giving you a relaxing self-care moment.

Cleansing Rose Face Mask Recipe

Ingredients:

  • 1 tablespoon of clay
  • A few drops of rose water

Instructions:

  1. Prepare the Rose Water
    If you’re making your own rose water, start by simmering fresh rose petals in water for about 20 minutes. Once done, strain the petals and set the rose-infused water aside to cool. You’ll only need a few drops for the mask, so store the rest for future skincare use.
  2. Mix the Mask
    In a small bowl, combine 1 tablespoon of white kaolin clay with a few drops of rose water (or plain water). Stir the mixture until it reaches a smooth, paste-like consistency. You may need to adjust the amount of water slightly, adding more or less to get the right texture. Make sure there are no clumps of clay left in the mixture.
  3. Apply the Mask
    Using a brush or your fingertips, apply the mask evenly to your face. Avoid the delicate eye area. Let the mask sit for about 15 minutes, allowing the clay to work its magic by drawing out impurities from your skin.
  4. Rinse Off
    After 15 minutes, rinse the mask off with lukewarm water, gently massaging your face as you wash. Pat your skin dry with a soft towel and follow up with your favorite moisturizer.

This face mask is ideal for all skin types, especially sensitive or dry skin, as white kaolin clay is known for being gentle yet effective. Use this mask once a week to keep your skin clear, smooth, and radiant.

Why Buy Ingredients from Wasteless Pantry?

At Wasteless Pantry, we provide eco-friendly, packaging-free ingredients like white kaolin clay, making your skincare routine more sustainable. By buying in bulk, you can get just the amount you need, helping reduce packaging waste and ensuring your skincare products are fresh and effective. You can even use bulk ingredients for other DIY skincare recipes, making it easier to live a zero-waste lifestyle while keeping your skin healthy.

Supporting sustainable practices with natural, waste-free ingredients not only benefits your skin but also helps reduce your environmental footprint. Every small choice, like opting for bulk ingredients, contributes to a cleaner, healthier planet.


Wattleseed and macadamia biscuits

Wattleseed and macadamia biscuits are a delightful and uniquely Australian treat. With their warm, nutty flavor, these biscuits are perfect for sharing with family or enjoying as a snack with your favorite cup of tea. Made with wholesome ingredients like rolled oats, macadamia nuts, and the native wattleseed, this recipe is not only delicious but also offers a great way to use sustainably sourced, packaging-free ingredients from Wasteless Pantry.

Wattleseed and Macadamia Biscuits Recipe

Ingredients:

  • 100g butter
  • 2 tbsp golden syrup
  • 4 tbsp brown sugar
  • 1 tsp ground wattleseed (from Wasteless Pantry)
  • 1/2 cup rolled oats (from Wasteless Pantry)
  • 1/3 cup chopped macadamia nuts (from Wasteless Pantry)
  • 2 cups plain flour

Instructions:

  1. Preheat the Oven
    Start by preheating your oven to 220°C (425°F). Prepare a baking tray by lining it with reusable baking paper.

  2. Melt the Wet Ingredients
    In a small saucepan over low heat, melt 100g of butter, 2 tablespoons of golden syrup, 4 tablespoons of brown sugar, and 1 teaspoon of ground wattleseed. Stir until the sugar is dissolved and the mixture is smooth, which should take about 3-5 minutes.

  3. Combine the Dry Ingredients
    In a large mixing bowl, combine 1/2 cup rolled oats, 1/3 cup chopped macadamia nuts, and 2 cups plain flour. Once mixed, pour in the melted butter mixture and stir until all the ingredients are well combined. If the dough is too dry, add a small amount of water, just enough to make the mixture crumbly but still hold together.

  4. Form the Biscuits
    Roll the dough into small balls (about 1 tablespoon each) and place them on the prepared baking tray. Flatten each ball slightly with your hand or a fork to create biscuit shapes.

  5. Bake the Biscuits
    Bake in the preheated oven for about 10 minutes or until the biscuits are lightly golden. Remove from the oven and let them cool on the tray for a few minutes before transferring them to a wire rack to cool completely.

These wattleseed and macadamia biscuits are wonderfully crunchy with a nutty, earthy flavor that the whole family will love. They’re perfect for school lunchboxes, tea-time treats, or even as a homemade gift.

Why Buy Ingredients from Wasteless Pantry?

When you source your ingredients from Wasteless Pantry, you not only get high-quality, fresh products but also contribute to reducing packaging waste. All the key ingredients in this recipe—such as rolled oats, macadamia nuts, and wattleseed—are available in bulk, allowing you to buy just what you need without any excess packaging. Shopping at Wasteless Pantry supports sustainable practices and helps you minimize your environmental footprint while still enjoying delicious, homemade treats.

By choosing packaging-free, locally sourced ingredients, you can make a positive impact on the environment and reduce food waste. At Wasteless Pantry, our mission is to provide eco-friendly alternatives that make it easy to live a zero-waste lifestyle.


Homemade Bread Roll Recipe

Nothing beats the smell of freshly baked bread, and making your own bread rolls at home is easier than you think! Whether you use a bread maker, a Thermomix, or your hands to knead the dough, this simple recipe will give you delicious, soft, and fluffy bread rolls that are perfect for any meal. Plus, by sourcing your ingredients from Wasteless Pantry, you’re not only making delicious food but also making a positive impact on the environment by reducing packaging waste.

Homemade Bread Roll Recipe

Ingredients:

  • 10g yeast (from Wasteless Pantry)
  • 600g bread mix (I used mixed grain bread mix from Wasteless Pantry)
  • 360g water

Instructions:

  1. Prepare the Dough
    Add all the ingredients—10g yeast, 600g bread mix, and 360g water—into a bread maker or Thermomix. Select the dough setting and, if available, choose the mixed grain option. If you’re mixing by hand, combine the ingredients in a large bowl, then knead the dough for about 10 minutes until it becomes smooth and elastic.

  2. Rest the Dough
    Once the dough has been mixed, let it rest in a warm place for about 1 hour, or until it has doubled in size. This is an essential step for light, airy rolls.

  3. Shape the Rolls
    After the dough has rested, divide it into even portions and roll each one into a ball. You can make them as small or as large as you like, depending on your preference.

  4. Bake the Rolls
    Place the dough balls onto a lined baking tray, leaving space between them for expansion. Bake the rolls in a preheated oven at 180°C (350°F) for about 30 minutes, or until the tops are golden brown.

  5. Cool and Enjoy
    Once baked, remove the rolls from the oven and let them cool on a wire rack. They can be enjoyed fresh or stored in an airtight container. These rolls also freeze well, so feel free to make them in bulk and enjoy them later!

These homemade bread rolls are a great addition to any meal, whether it’s a family dinner or a casual lunch. The mixed grain bread mix gives them a hearty texture and added nutrients, making them a healthier choice for everyday meals.

Why Buy Ingredients from Wasteless Pantry?

At Wasteless Pantry, we offer high-quality, packaging-free ingredients like yeast and mixed grain bread mix in bulk, allowing you to buy exactly the amount you need while minimizing waste. By shopping with us, you can reduce your environmental impact by eliminating unnecessary packaging and plastic waste. Our ingredients are fresh, sourced sustainably, and stored in eco-friendly containers, ensuring that your homemade bread rolls not only taste better but are also better for the planet.

Supporting a zero-waste lifestyle doesn’t have to be complicated. By choosing bulk ingredients and making your own food at home, you contribute to a more sustainable way of living. Plus, there’s nothing more satisfying than baking your own bread from scratch with ingredients that are both eco-friendly and nutritious!


Rose Petal Bath Salts Recipe

Rose petals are incredibly versatile and can be used in a variety of ways, from making rose water to creating a romantic bath setting, or even in cooking and tea. But one of the most soothing ways to use them is by making your own luxurious bath salts. This Rose Petal Bath Salts recipe combines the relaxing benefits of Epsom salts, the beautiful aroma of essential oils, and the delicate touch of rose petals to give you a calming bath experience. Best of all, you can find all the ingredients you need at Wasteless Pantry, helping you minimize waste and create a truly eco-friendly bath product.

Rose Petal Bath Salts Recipe

Ingredients:

  • 1 cup Epsom salts (from Wasteless Pantry)
  • 10-20 drops of essential oil (such as lavender, rose, or chamomile)
  • 1/4 cup amber salt (from Wasteless Pantry)
  • 1/2 cup dried rose petals (from Wasteless Pantry)

Instructions:

  1. Mix the Epsom Salt and Essential Oil
    In a glass bowl, combine 1 cup of Epsom salts and 10-20 drops of your favorite essential oil. Stir the mixture well until the oil has been fully absorbed into the salts, ensuring there are no clumps. This step should take about 2-3 minutes.

  2. Add Amber Salt and Rose Petals
    Next, stir in 1/4 cup of amber salt and 1/2 cup of dried rose petals. Mix gently until all the ingredients are well distributed.

  3. Store the Bath Salts
    Once mixed, transfer the bath salts to an airtight glass jar to keep them fresh and fragrant. Store in a cool, dry place. To use, add a handful of the bath salts to warm bathwater and soak in the luxurious, aromatic experience.

These rose petal bath salts not only smell divine but also help to relax your muscles, soften your skin, and soothe your mind. They make an excellent gift or a personal treat for some much-needed self-care.

Why Buy Ingredients from Wasteless Pantry?

When you buy your ingredients from Wasteless Pantry, you’re supporting a zero-waste lifestyle by purchasing in bulk and minimizing unnecessary packaging. You can get high-quality Epsom salts, pink lake salt, and dried rose petals, all without the waste that comes from pre-packaged products. By choosing packaging-free options, you reduce your environmental impact and contribute to a more sustainable planet.

Additionally, when you create your own bath salts at home using fresh, locally sourced ingredients, you know exactly what’s going into your product—no added chemicals or preservatives—just pure, natural goodness.

Benefits of Rose Petal Bath Salts

  • Relaxing and Soothing: Epsom salts help relax sore muscles while the essential oils create a calming aroma.
  • Nourishing for the Skin: Amber salt and rose petals gently exfoliate and nourish your skin.
  • Zero Waste: Made with eco-friendly, packaging-free ingredients from Wasteless Pantry, helping reduce plastic waste.

Chia Pudding Recipes

Chia pudding is the perfect versatile dish that works for breakfast, dessert, or a quick snack. It’s packed with fiber, healthy fats, and can be easily customized to your taste. This week, we’re sharing three of our favorite chia pudding recipes that are sure to be a hit! Plus, by sourcing your ingredients from Wasteless Pantry, you’ll not only be enjoying a tasty treat but also supporting a zero-waste lifestyle.

Chia Pudding Base Recipe

Ingredients:

  • 1 1/2 cups of milk of choice (for the choc and cherry pudding, we used chocolate almond milk)
  • 1/2 cup chia seeds
  • 1-2 tbsp maple syrup
  • 1 tsp vanilla extract
  • Fruit to serve

Instructions:

  1. Prepare the Base
    In a mixing bowl, combine 1 1/2 cups of milk, 1/2 cup chia seeds, 1-2 tablespoons of maple syrup, and 1 teaspoon of vanilla extract. Stir the ingredients well to ensure the chia seeds are evenly distributed and the mixture begins to thicken. This should take about 2-3 minutes.

  2. Customize and Refrigerate
    You can add fruit directly into the pudding mixture at this stage or keep it simple and top with fruit when serving. Once mixed, pour the chia pudding into jars or containers and refrigerate overnight, or for at least 4 hours. This allows the chia seeds to absorb the liquid and create a pudding-like consistency.

  3. Top with Fruit and Serve
    When ready to eat, top your chia pudding with fresh fruit and enjoy!

Three Chia Pudding Variations

  1. Apple Cinnamon Chia Pudding
    Add 1/2 teaspoon of cinnamon to a small amount of hot water and stir until dissolved. Mix this into your chia pudding base for a warming, spiced twist. Top with fresh apple slices before serving.

  2. Chocolate and Cherry Chia Pudding
    For a rich, indulgent treat, use chocolate almond milk in the base. You can also replace some of the milk with cherry juice (especially if you’re using canned cherries). Top with fresh or canned cherries for a delicious chocolate-cherry flavor combination.

  3. Classic Vanilla Chia Pudding
    Keep it simple with the original recipe and top with your favorite fruits like berries, banana slices, or kiwi for a light and refreshing snack or breakfast option.

Why Buy Ingredients from Wasteless Pantry?

By purchasing your chia seeds, maple syrup, and other ingredients from Wasteless Pantry, you’re making a sustainable choice. We offer high-quality bulk ingredients without the unnecessary packaging, allowing you to buy just what you need. This helps reduce food waste and plastic waste, making your meals more eco-friendly. Supporting Wasteless Pantry also means supporting local sustainability initiatives and promoting a zero-waste lifestyle in your everyday choices.

Benefits of Chia Pudding

  • Nutritious: High in fiber, omega-3 fatty acids, and protein, chia seeds are a great addition to a healthy diet.
  • Customizable: You can create endless flavor combinations by switching up the milk, sweeteners, and toppings.
  • Eco-Friendly: Made with bulk ingredients from Wasteless Pantry, this recipe helps reduce packaging waste.

DIY Zero-Waste Air Freshener

Looking for a simple, affordable, and zero-waste way to freshen up your home? This DIY air freshener is a fantastic, eco-friendly alternative to store-bought sprays that often come in plastic packaging and contain harmful chemicals. With just a few natural ingredients, you can create a refreshing, chemical-free air freshener that will leave your home smelling amazing. Plus, all the ingredients can be sourced from Wasteless Pantry, making it even more sustainable!

DIY Air Freshener Recipe

Ingredients:

  • 3/4 cup of water (filtered or distilled)
  • 1 tbsp vanilla extract
  • 10-15 drops of your favorite essential oil (e.g., lavender, eucalyptus, lemon)

Instructions:

  1. Prepare the Mixture
    In a small bowl, combine 3/4 cup of water with 1 tablespoon of vanilla extract. The vanilla provides a warm, soothing base for your air freshener.
  2. Add Essential Oils
    Next, add 10-15 drops of your favorite essential oil to the mixture. You can choose scents like lavender for relaxation, eucalyptus for freshness, or citrus oils like lemon or orange for a vibrant and energizing fragrance. Adjust the number of drops based on how strong you want the scent to be.
  3. Transfer to a Spray Bottle
    Pour the mixture into a spray bottle. Be sure to choose a reusable glass spray bottle to keep your air freshener zero-waste. You can easily find these bottles at Wasteless Pantry or repurpose one you already have.
  4. Shake and Freshen Up
    Before each use, shake the bottle well to ensure the oils and water are mixed. Then, spray your DIY air freshener in any room to instantly freshen up the space.

This air freshener can be used in living areas, bedrooms, bathrooms, or even in your car for a natural burst of fragrance without the chemicals.

Why Buy Ingredients from Wasteless Pantry?

At Wasteless Pantry, you can find all the ingredients needed to make this DIY air freshener, such as essential oils and vanilla extract, available in bulk and without unnecessary packaging. By purchasing ingredients in bulk, you help reduce plastic waste and avoid harmful chemicals commonly found in commercial air fresheners. You can also buy only what you need, further reducing food and packaging waste.

By making small changes like creating your own air freshener, you support a more sustainable lifestyle that benefits both your health and the environment. Wasteless Pantry helps make these choices easier by offering eco-friendly alternatives to everyday products.

Benefits of DIY Air Freshener

  • Chemical-Free: Made with natural ingredients, this air freshener is safe to use around children and pets.
  • Cost-Effective: A homemade solution that’s more affordable than most store-bought air fresheners.
  • Eco-Friendly: Made with bulk, packaging-free ingredients from Wasteless Pantry, reducing your carbon footprint.

Warm Apple Cinnamon Porridge Recipe

As the cooler months set in, there’s no better way to start your morning than with a warm and comforting bowl of Apple Cinnamon Porridge. This simple yet nutritious recipe blends rolled oats, fresh apples, chia seeds, and warming spices like cinnamon and ginger. Gently cooked in your choice of milk and naturally sweetened with maple syrup, this porridge makes for a hearty breakfast that’s both delicious and healthy. Top it off with sliced apples, cranberries, and an extra sprinkle of cinnamon for a breakfast that will warm you from the inside out.

Warm Apple Cinnamon Porridge Recipe

Ingredients:

  • 1/3 cup rolled oats
  • 1 large apple, peeled and chopped
  • 1 tbsp chia seeds
  • 1 tsp ground cinnamon
  • 1/4 tsp ground ginger
  • Pinch of salt
  • 1 to 1 1/2 cups milk (dairy or nut-based)
  • 1 1/2 tbsp maple syrup
  • 1/2 tsp vanilla extract

Instructions:

  1. Prepare the Porridge Base
    In a medium-sized saucepan, combine 1/3 cup rolled oats, 1 large chopped apple, 1 tablespoon chia seeds, 1 teaspoon ground cinnamon, 1/4 teaspoon ground ginger, and a pinch of salt. Pour in 1 to 1 1/2 cups of your choice of milk (depending on how creamy you like your porridge) and add 1 1/2 tablespoons of maple syrup and 1/2 teaspoon vanilla extract.

  2. Cook the Porridge
    Set the saucepan over medium heat, stirring the mixture to combine all the ingredients. Cook for about 9-15 minutes, stirring often to prevent sticking. The porridge is ready when it thickens and the oats become soft.

  3. Serve and Enjoy
    Once cooked, spoon the porridge into bowls and top with your favorite toppings. I love adding extra apple slices, dried cranberries, and an extra sprinkle of cinnamon for a cozy, flavorful touch.

This warm apple cinnamon porridge is a fantastic way to start your day with a mix of fiber, vitamins, and antioxidants. It’s not only filling but also packed with the natural sweetness of apples and the earthy spice of cinnamon and ginger, making it a delicious and nourishing breakfast.

Why Buy Ingredients from Wasteless Pantry?

At Wasteless Pantry, we offer bulk, packaging-free ingredients such as rolled oats, chia seeds, and maple syrup, allowing you to make this delicious porridge with minimal waste. By purchasing in bulk, you buy only what you need, helping reduce unnecessary packaging and your environmental footprint. Choosing sustainable ingredients not only benefits the planet but also ensures you have fresh, high-quality products for all your cooking and baking needs.

Supporting Wasteless Pantry means supporting a zero-waste lifestyle, making it easier to reduce single-use plastics and excess waste in your kitchen. Every small step, like choosing bulk ingredients, contributes to a more sustainable future.


Perfect Pancakes

Everyday should start with fluffy pancakes made with ingredients from Wasteless Pantry, your local plastic free store!

Whether you are gluten-free, dairy-free, vegan, or egg-free, this recipe can be adapted easily. Any which way you make it, it will be delicious! Even more so because when you shop at a plastic free store there is no waste. For this reason there are no packets to throw away, not even anything to recycle. You can refill your containers over and over again. 

Plus, plastic free shopping is just more fun! You’re not bombarded with too many choices. As there is usually only one type of the item, say baking powder, so you just have to decide how much you want. Weighing your containers is a breeze with our dedicated weigh stations. Meaning that when you get home, everything can go straight into the cupboard without having to be decanted.

The recipe…

1 cup of plain flour (gluten free or regular)

1 tsp of baking powder (or you can use 1 cup of SR flour)

250ml or 1 cup of milk (plant based or dairy)

An egg or 1 banana

1 tsp cinnamon

1/2 to 1 tsp vanilla extract

Mix all the dry ingredients in a bowl. Once well combined add in the wet ingredients and beat until smooth.

Then spoon into a fry pan and flip when bubbles form.

You can even add some ground ginger, nutmeg or all spice!

All the ingredients you need are available at your nearest Wasteless Pantry zero-waste, plastic-free, bulk food store.

After this are you keen for another delicious breakfast recipe? Check out our Chia Puddings recipes.

plastic free shop pancakes recipe

Gluten-Free Pizza Base Recipe

If you’re looking for a great gluten-free pizza base, look no further! This simple recipe, a favorite of our team member Rachael, yields fantastic results every time. It’s easy to make, yields two large pizzas, and can be doubled for extra dough. Perfect for gluten-sensitive eaters or anyone wanting to try a healthier pizza alternative. Plus, when you source your ingredients from Wasteless Pantry, you’ll be supporting a zero-waste lifestyle while enjoying a homemade meal.

Gluten-Free Pizza Base Recipe

Ingredients:

  • 1 tbsp dry active yeast
  • 1 1/4 cup warm water (divided)
  • 1-2 tbsp sugar (divided)
  • 3 cups gluten-free plain flour
  • 1 tsp salt
  • 1/2 tsp baking powder
  • 1 tbsp olive oil
  • 1 tbsp xanthan gum (optional for a chewier base)

Instructions:

  1. Activate the Yeast
    Preheat your oven to 180°C (350°F). In a small bowl, combine 1 tablespoon of dry active yeast with 3/4 cup of warm water. Let it sit for 5 minutes to activate. After about 3 minutes, sprinkle in 1 tablespoon of sugar to help the yeast grow.
  2. Mix the Dry Ingredients
    In a separate bowl, whisk together 3 cups of gluten-free plain flour, 1 teaspoon of salt, 1/2 teaspoon of baking powder, and the remaining sugar. Whisk until well combined.
  3. Combine Wet and Dry Ingredients
    Create a well in the center of the dry ingredients and pour in the activated yeast mixture, 1 tablespoon of olive oil, and an additional 1/2 cup of warm water. Stir until the mixture is well combined and a dough begins to form.
  4. Knead the Dough
    Lightly flour your work surface with gluten-free flour. Knead the dough for a few minutes until it’s no longer sticky. You can add a little more flour if necessary, but try to avoid over-kneading.
  5. Shape the Pizza Base
    Divide the dough into two equal parts. Place each portion onto a reusable baking liner on a pizza tray. Use your hands to press the dough from the center outwards, or roll it out with a rolling pin or an empty jar until it’s thin and evenly spread.
  6. Pre-Bake the Crust
    Pre-bake the pizza crust for 20 minutes or until it looks dry. Don’t worry if the crust appears hard or cracks—this is normal for gluten-free dough.
  7. Add Toppings and Bake
    Remove the crust from the oven. Spread a generous layer of sauce and add your favorite toppings. Return the pizzas to the oven and bake for another 15-20 minutes, or until the toppings are cooked and the crust is golden.

This recipe is not only delicious but can be easily customized with your favorite toppings. Whether you’re a fan of classic margherita or loaded veggie pizzas, this gluten-free base is a great foundation for your meal.

Why Buy Ingredients from Wasteless Pantry?

At Wasteless Pantry, you can source gluten-free plain flour, olive oil, and other essentials in bulk, all without packaging waste. By buying ingredients in bulk, you reduce unnecessary plastic and packaging, making your meal more eco-friendly. Plus, you can purchase just the amount you need, minimizing food waste. Shopping sustainably doesn’t mean compromising on flavor—it just means making better choices for the planet!

Supporting Wasteless Pantry helps you maintain a zero-waste kitchen, reducing your environmental impact with every meal you make. Small changes, like choosing bulk ingredients, contribute to a more sustainable future.


Winter Warmer Lentil Soup Recipe

Here’s a comforting winter warmer lentil soup recipe that’s perfect for soup weather! This simple and delicious recipe features a hearty mix of onions, carrots, celery, and garlic sautéed in olive oil, combined with a rich blend of lentils, split peas, barley, and aromatic seasonings like bay leaves. You can use either homemade or store-bought stock, and after simmering, blend the soup to create a smooth, creamy texture. Serve with crusty bread, and garnish with parsley and a swirl of cream for an extra touch of warmth. Perfect for cozying up on chilly evenings!

Ingredients
1-2 tbsp Olive oil
2 cups diced onions
2 cups diced carrots
2 cups diced celery

plus these from Wasteless Pantry:

2 tsp garlic granules (or 2 fresh cloves)
1 cup of soup mix (mix of lentils, split peas and barley) or split peas
36g dried chicken or vegetable stock plus 2L water (or 8 cups of chicken or vegetable stock)
1 bay leaf
Salt and pepper

Method
In a large saucepan, heat oil and cook onion, carrot, celery and garlic over medium heat until softened. Stir in soup mix or split peas, stock and the bay leaf.
Cover, reduce heat and simmer for 2.5 hours, stirring frequently.
Puree warm soup with a blender. Serve with crusty bread and garnish with some parsley and cream on top 😄

Sourcing ingredients from Wasteless Pantry for your winter soup not only ensures quality and freshness but also supports sustainable practices. Shopping at Wasteless Pantry allows you to buy in bulk, reducing packaging waste and minimizing environmental impact. Moreover, choosing local and bulk options helps in reducing the carbon footprint associated with food transportation and packaging. This way, you contribute to a healthier planet while enjoying a nutritious and delicious meal.